Friday, January 9, 2015

Amazing thrift store find

...or so I thought. Meet the newest member of the family:

This is a Viking 6440 ca. 1978. I found it at the local gold mine with manuals and all accessories for 25 bux. It actually didn't have a price on it so they took my offer. Apparently people will pay upwards of 300 for these things in the right circumstances. I've never had a Viking before and this one was seized. After I got it moving, I discovered that the phenomenal number of plastic parts inside ALL needed replacing. And I thought 70s Singers were bad.

So after spending quite a lot of money for these absurdly expensive parts, I still couldn't make it work right and was really tired of dicking with it. It is unpleasant to work on and things don't seem to work the way the service manual says they will. I kept posting questions to the Viking yahoo group and finally a former Viking tech offered to fix it for me for a fee. I send it to him and got it back today. He did a great job!

Now that it's working, I must say, it is an excellent machine. It's simple to use and the stretch stitches are very precise; that is to say that when the stitch reverses and the needle is supposed to penetrate a hole that has already been punched, it goes precisely back into that hole, unlike my Singer 920 and even my computerized Pfaff. It also has a low gear for added punching power. I have seen them described as "able to punch through steel".

I think the best part about it is that it is a mechanical machine with a true 3-step zigzag. Most just give you a dotted wavy line which does not stretch. I've popped plenty of stitches on seams made of this supposed stretch stitch. Now I understand why Viking fans like them so much. Having said all that, with all this plastic, it will only be around a few more years. Parts are still available now, but that's not likely to be the case much longer. Future proofing is a big deal to me.

And check out that neat custom cabinet insert. I got it for 25 bux from a place called Shopjoya.com. It had a price sticker on it for something like $69. You can barely see it in the photo because it's completely clear and not scratched up yet.

Tuesday, November 4, 2014

66 tweeks

Here's a neat trick if you have a back clamping 66. A lady in Florida sells locally machined adapters to put on your presser bar that enable it to accept low shank attachments, including articulated ones like buttonholers.
Here it is on the machine with a straight stitching foot attached:
 The thumb screw is long and sturdy. Here it is with my blindstitcher:
It is installed by removing the back clamping collar and replacing it with this adapter. The original screw is used to fasten it to the bar. I'm not going to publish her email address, but you can find her contact information at TreadleOn under "lindalu".

I have a cheap hand crank I was going to use with this machine. In fact, I had not planned to put this machine back in the treadle base. I bought a handmade wooden display base for it to sit in for hand cranking and I was going to leave the converted 306 in the treadle. I decided I didn't like the 306 enough to waste the treadle on it after the restoration turned out so well, and I thought I could put the hand crank on the 306 to use with the original spoked wheel off the 66. I even went out and bought some brown paint for the wheel. Wouldn't you know it, the spoked wheel is larger than the original solid wheel and the hole in the motor boss wouldn't line up with the hole in the hand crank. I decided to put it on the 66 anyway so here's that mod:

So now I can treadle or crank. Neither method adds any drag to the other to speak of. I always liked the idea of a hand cranked machine, but having finally tried it, I'm not too keen. You have a lot of control over the machine, but not a lot over the sewing. I'll probably take it back off.

I've noticed from working with really old machines that the introduction of plastic gears and rubber belts in the 50s and 60s caused a decline in quality that was far more severe than I thought. There are machines over 100 years old that are still gliding silently away, as smooth as the day they were made, and then you have machines like my Futura 920, where something tears up literally every single time I use it. Even though that machine is 40 years old and well made by today's standards, there is no comparison between that machine and my grandmother's 15-91, about 20 years older. The only plastic on that one is a little bakelite here and there. I'll take bakelite over plastic any day. It may be brittle, but it doesn't rot. I saw on the sewing machine episode of "Secret Life of Machines" where manufacturers would destroy trade-ins to get them off the market because they never went bad. Then they discovered plastic. And then in the 70s came the holy grail of obselesence, electronics.

Saturday, October 25, 2014

66 is finished!

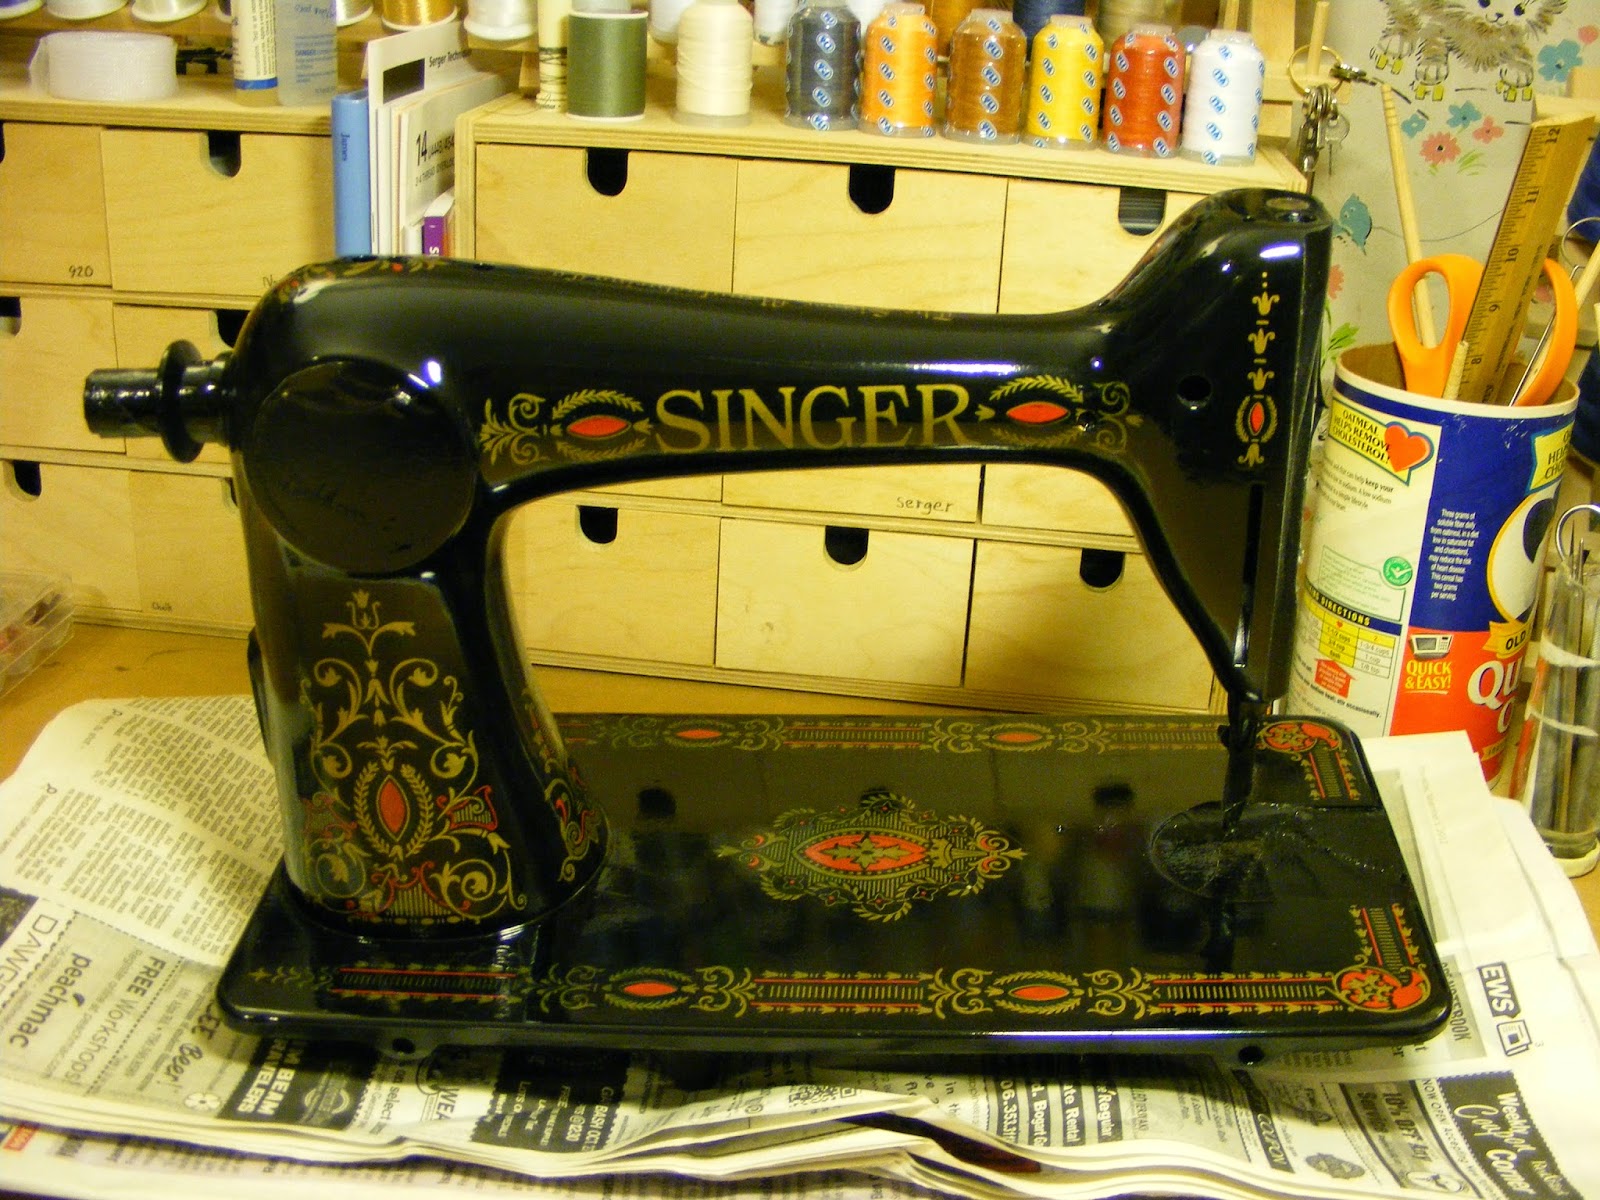
The day I thought would never come has come! The 66 is finished and operational! I can't believe how after 102 years, it's still such a pleasure to use. So quiet and smooth and precise! And I also can't believe how well the restoration turned out. It was truly an amateur operation and quite the learning experience. It's not something I see myself doing again. Now without further ado...


Can you see the very obvious scratch I made with a screwdriver blade?


You can see the uneven printing of the decal. These are the original cover plates. They are pitted but usable.
An early rear clamping shank. I managed to find a set of attachments for it but I may replace it with a normal shank so I can use buttonholers and and other articulated attachments with it.
I had to replace this upper thread guide because I thought it was a friction fit and ended up damaging mine. It is NOT a friction fit and is sometimes necessary to use glue.


And here it is back in the skanky table it came with.

Now about the budget. Let's just say it's blown. And then some. I ended up buying a new balance wheel because I wanted the shiny chrome and I couldn't do it myself on my old one. As I said in the previous post, I had to buy new bobbin area parts. Here's why:

Just like sandpaper
Let's see...in addition to copious amounts of painting supplies, I also bought new etched covers and a stop motion knob. A new belt...decals...plating kit...We're probably looking at $300 easy. I guess that's not too far out of line with one in good condition but those usually come with a decent table. I hate that the decals don't have that sparkle like the original gold did, but I guess that's my only complaint about the whole project.

Well, that's all folks. I can put this one to bed. I wanted to show more photos, but I didn't want to make this post too photo heavy, so I made a web album. You can view it here.

Wednesday, October 22, 2014

Parts are plated

Plating went well with the electroless plating kit I got from Caswell. I was apprehensive about getting one shot at it and screwing it all up, but that wasn't the case. The process is virtually fool proof and if something does go wrong, it can be fixed. Unbelievably, nothing went wrong during this process. Unfortunately, however, the quality of the plate is dependent upon the quality of the surface before plating. That is, a polished surface will get a mirror finish, while a rough one will get a dull finish, and any flaws are still visible. Makes sense.

Here are the results:


You can see in the close ups how the condition of the part affects the outcome.  You can plainly see all the pits and flaws. The plate is too thin to hide flaws but thick enough to cause tightness during reassembly. Some of the tolerances are so small, I had to get creative during reassembly. I actually did this weeks ago and have been reassembling the machine over the past month.

The hook is badly pitted and I doubt will be usable. It isn't smooth in the slightest. And the bobbin case has a sandpaper like texture that would not buff away. It was virtually useless in the machine because it would grab the thread rather than letting it pass over. I've ordered replacements.

Here is a close up of the assembled bobbin winder and stitch length knob:
The stitch knob turned out beautifully because its finish was relatively undamaged. The toothed wheel of the bobbin winder still had most of its mirror finish, although pitted, and it is shiny and smooth after plating. All the silver parts in this photo have been plated.

The machine is back in the treadle base now and I'm just making final adjustments and waiting for the replacement parts. Overall, I'm quite pleased with how this project is turning out. I was expecting it to look more amateurish than it does, even though it is certainly amateurish. It actually looks quite good and stands up fairly well to inspection. I'll be making a final update and cost recap once the job is completed.

Tuesday, September 30, 2014

66 project not dead

Bet you didn't expect to see this again. Like anybody reads this anyway. It's got two coats of clear on it right now. I'm trying to decide if I want to risk polishing it or adding more coats or just leave it alone. The clearcoat is spray can automotive paint but it doesn't seem to be very durable. It already has scratches from a couple of light dustings while it sat waiting for my attention. It was in a protected location so there's no reason for the finish to have damage. Also, there are cracks in the paint where the vertical part joins the bed. I don't know if it's in the black or just the clear. I know they weren't there when I painted it last.

Anyway, here are the pictures I promised 20 months ago:


You can easily see the edges of the decals in the clearcoat. I would think the clear needs to be pretty thick to blend them in or stand up to actual use.


And here's a close up of those paint cracks:
I'm ready to plate the metal parts in the next day or so. One of the reasons this project got so bogged down is all the math to calculate the surface areas of all the parts and mix the bath. I have no idea whether I've prepared the metal well enough to make the new plate stick. I've done the best I can and we'll see what happens. On the plus side, it looks like I'll have a lot of solution left over, so I'll be able to do more parts than I thought.

Sunday, January 13, 2013

Decals on 66 a success

Well, the 66 budget is blown. Quite a while ago, I was able to buy a set of redeye decals from this guy, but they cost $80. I had gotten bogged down in the painting stages and lost interest for a while. I finally got the black paint satisfactory and went ahead with the decals.


They're easy to apply. They're water slide decals, so if you've ever built a model car, train, plane, etc, you already know how to do it. On flat surfaces, they go on virtually trouble free and don't trap much air.
Curves are a different story. It's hard to get the decal to conform to outside curves without bunching. If you think about it, it makes sense. It's why we use darts in our clothes. Even though I used some Testors brand decal solution left over from my model building days, I still had to strategically slash the decals to get them to conform.  It doesn't stand out, but doesn't hold up to scrutiny, either.

Here's a close up of the polished badge nestled within a decal. I don't have pictures of the finished decalling because I put on the first coat of clear today and I don't want to disturb it while it's drying. After another coat and some polishing, I will post pictures of the completed paint job.

Monday, September 3, 2012

Finally, finishes for knits that don't look home made

Knits can be trouble. Because they stretch, they want to stretch as they go under your presser foot resulting in puckered, stretched, or lettuce-edged seams and edgings that look horrible at worst and home made at best. Here are some things I've found that help create professional looking finishes.

First of all, if you have a walking foot, use it. My primary machine is a Pfaff 1471 with a built in walking foot, but because this pulls from behind the foot rather that in front, I still had stretching when I sewed. A really good combination is Singer's rubber feed dogs (on older models) with the even feed foot. This has the capacity for extremely precise sewing, especially on difficult fabrics, as long as the machine will tolerate the fabric.

Secondly, make liberal use of laundry starch and let it dry before continuing. This seems to take forever and ironing doesn't speed up the process much. Sometimes spray starch is enough but other times it can be enormously helpful to make up a batch of Argo starch and dip your fabric in it before it is cut. The starch really helps control rolling edges and gives body to unruly lightweights that machines sometimes struggle with. However, my Singer combination described above just would not tolerate the lightweight T shirt knit shown below (this was before I learned about using boiled starch). Fortunately, my primary machine did, but if your machine is struggling there are a few things you can try. The only one I know off the top of my head is to sandwich the fabric between layers of tissue paper. Another thing that might help is to decrease presser foot pressure.

For edgestitching, adjust your needle position so you get as much fabric as possible under the foot. And obviously, you should be using ball point needles. Most knits require a seaming stitch with width, but if a straight stitch is used, it can be advantageous to use the straight stitch foot and throat plate.

Hemlines

I did some internet research for hemming knits and almost every site recommended stitching the hem with a twin needle and woolly nylon in the bobbin. Even Nancy Zieman says to do it this way. The combination of zigzaging and built in stretch of the woolly nylon is supposed to give the seam a lot of stretch. Maybe it's just me, but every time I try to do this, I end up with a tuck between rows of stitching. Even if I manage to stabilize the fabric enough to stay flat during the stitching, as soon as I flex the seam, the tuck appears and won't go away. After lots and lots of experimentation, I came up with a good, flat hem solution for casual garments.
Bottom row is wrong side
This is a feather stitch over the turned up, raw hem accomplished the same way you'd do a cover stitch. The raw edge doesn't need to be finished because knits don't ravel and finishing adds unnecessary bulk. Stabilize the entire hem with spray starch if you didn't dip the fabric before starting your project--from the hem allowance to the stitching line--and press it to the wrong side. Stitch from the right side, placing your line of stitches to catch and cover the raw edge. You can either stitch a fixed width from the edge and cut off any excess later or you can adjust your stitching according to the location of the cut edge if your cutting was precise. You can feel the cut edge under the top layer while you're topstitching so you know where to sew. I figure nobody's going to be looking closely enough at my hem to notice whether the stitching varies by an eight of an inch here and there and it saves me the trouble of doing any trimming later. I was surprised by how good this looks on the finished garment. It lies flat and mimics coverstitching very well.

Before I discovered this, I'd been finishing the edge with serging and zigzagging the hem seam:
You don't need to do this

This just doesn't look as good.
 Another good way to finish an edge when a narrow hem is desired is to do this:
I don't know if you can see this well, but this hem was turned up 5/8" and zigzagged 1/4" from the fold. Then I trimmed off the excess close to the stitching. I expect it to try to roll after it's been cut a while, so I'll come back later and trim again when it does. Again, flat seam that isn't bulky. Update: on this particular fabric, this hem isn't stable and the whole thing rolls.

Here's one I thought was clever at the time:
This is a 3 step ZZ on slippery Under Armour in green thread. I thought the green would look somehow bolder but I'm glad it didn't because the stitching is irregular due to the slipperyness of the fabric. If I'd used white thread it wouldn't have mattered. This whole shirt is kind of a disaster as you'll see below.

If you have a fabric that still won't behave, you can fuse a strip of knit interfacing to the hem allowance before stitching. Steam-a-seam was recommended to me so I went out and bought some. When I used this, the hem was stiff and heavy and had no stretch at all. It made it look like masking tape was stuck to the underside of the fabric. You definitely want to use knit interfacing if you do this.

Necklines

Necklines give me the most grief. Almost any kind of treatment (binding, facing, turning under) comes out stretched or otherwise botched. Ripping stitches out of a knit is a nightmare and I've had to rip out many a neck treatment. My first attempt at making a neckline without ribbing was the under armour shirt mentioned above:
I turned the edge under twice and stitched it, not knowing what was going to happen. I ripped this out and put on foldover elastic but cut it the length of the neck opening circumference. This was even worse. I ripped out again and cut the elastic shorter with no improvement. I ripped it out yet again and let it sit for 9 months. By this point, the neckhole had grown considerably from all the stress.

In the meantime, I learned how to make this from a back issue of Threads:
In the May 2003 issue, there is an article, "Neckline Finishes for Knits," that describes various finishes for knit necklines, including this one. The author also has videos on Threads' website that show you how to do it. I don't know what to call this; it isn't bound and it isn't ribbed, although the process is identical to applying ribbing. The secret is the difference between the binding length and the neckhole circumference. Your binding has to draw in the bodice fabric without gathering it so you have a nice, tight finish. The seam is stitched with a narrow 3 thread overlock so it stretches. This was a breakthrough.

Encouraged, I went back to the under armour with my new technique. Now I have success!
I didn't even bother to change the thread in the machines. I just used what was already there. The shirt was already such a mess, it isn't going to matter. What does matter is that I can do this! And since I learned about this, I've noticed how many of my ready to wear clothes have this finish. Some of them have the seam allowance topstitched, but when I tried to do this, I got another stretched out neckline. I just let them float. They're not going to stay where I want them anyway.

A few hints that are in the video but not the article:

1. Sew the binding to the neckhole with the garment lying flat across the machine bed like this:
so you can sew a curved seam and also see when you need to stretch. She's got the foot inside the neckhole with the shoulders on either side.
2. Stretch in the same areas as you did when determining the length of the binding, i.e. more for sharper curves and less for shallow ones.
3. Don't stretch the bodice while sewing if you can help it.
4. You may need to stretch the seam slightly while serging.
5. Use a wider seam allowance when serging in order to cover the basting stitches. This is where I go wrong a lot. Having an adjustable seam guide on your serger is invaluable.

You can sew a piece of ribbon over the seam allowance to stabilize the back of the neck if it wants to stretch too much.